Sunday, December 18, 2011

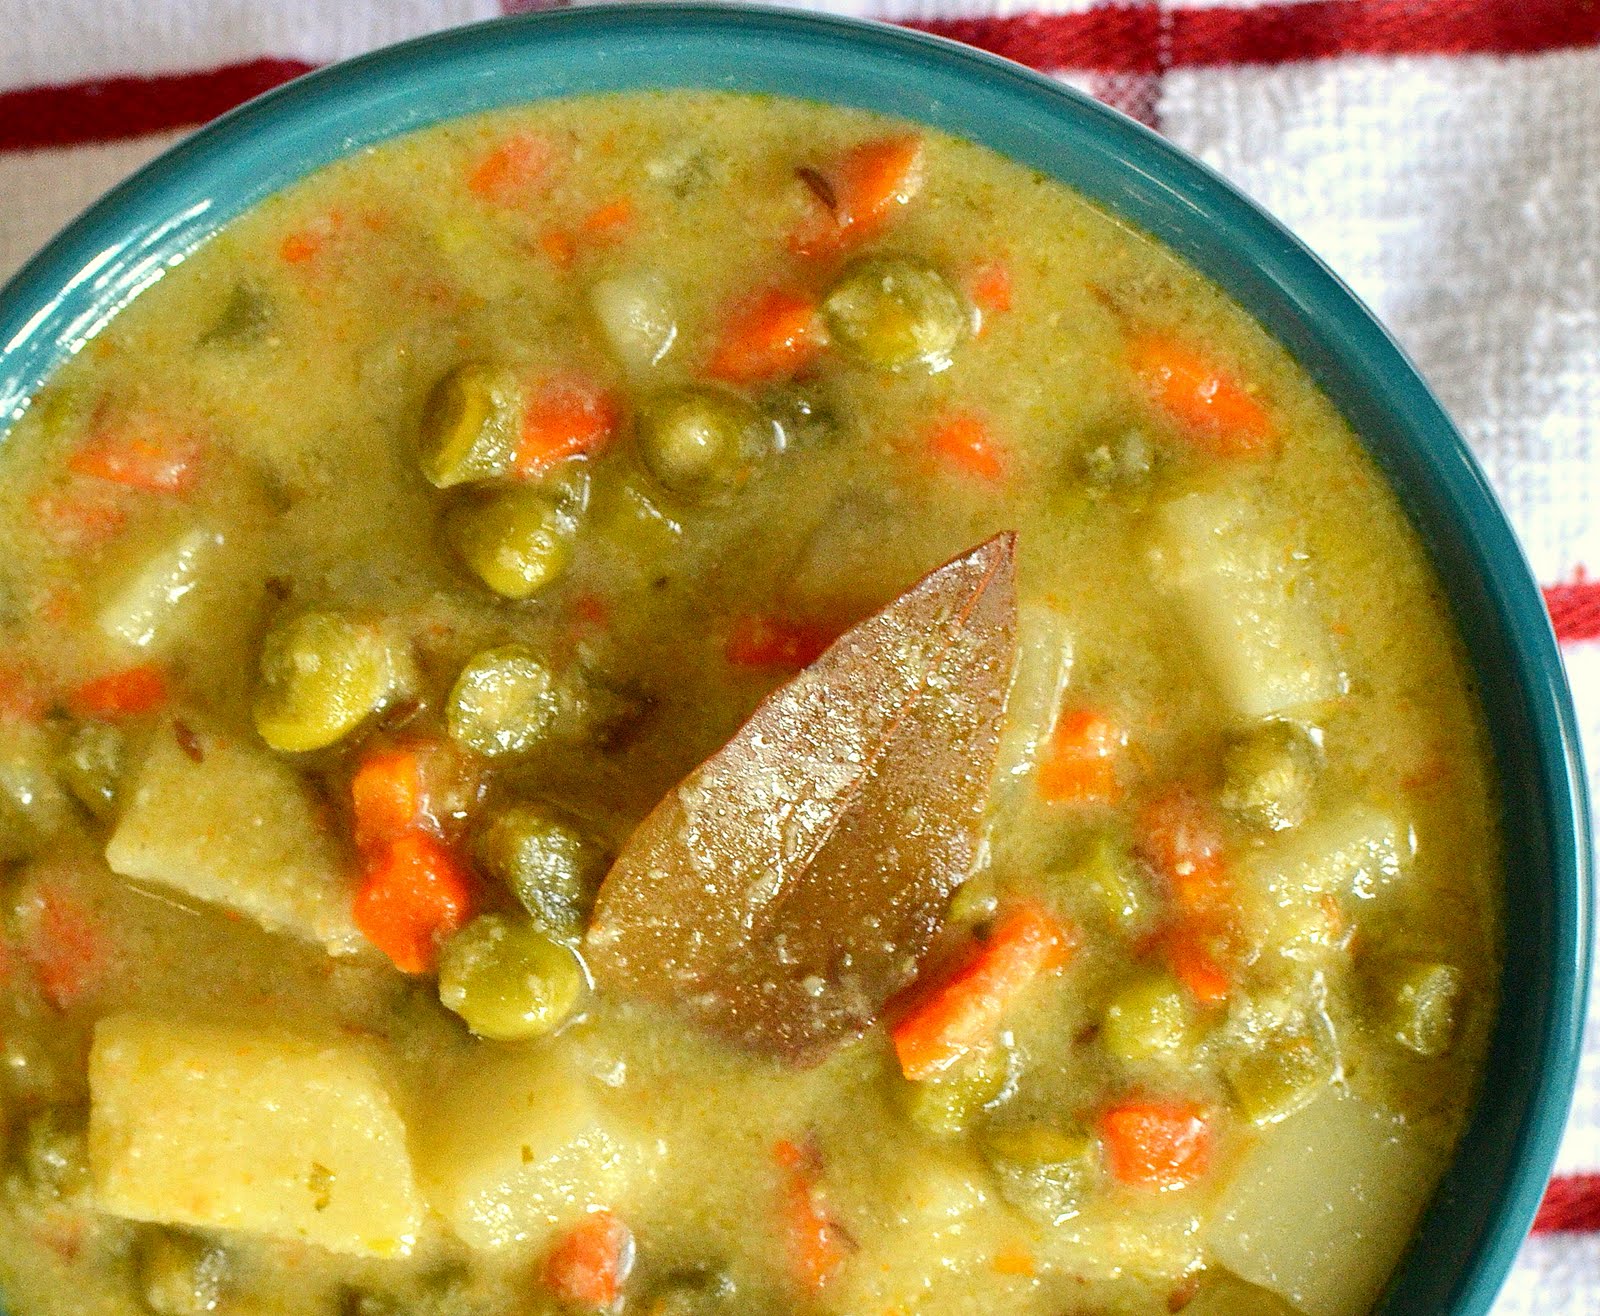
Arachu-vitta Sambhar - Virundhu Saapadu Series

As a kid I never liked sambhar. I was the lone one battling it out on the rasam-team. But my tastes changed for the good and now the thing I miss the most is simple, home-made sambhar of amma. To tell you the truth, I miss my dad's version of sambhar more than my amma's - his sambhar has a very distinct taste to it and I can tell from just the aroma who made the sambhar. I miss dad :(

But one version of a sambhar that I liked even in my rasam-team days was the arachu-vitta sambhar. It has a unique flavor to it and is much thicker than normal sambhar; mainly due to the grated coconut paste that's added to it. This recipe is a typical Tirunelveli version. Usually sambhar is made with some kind of vegetable in it. My favorites are murungakkai (moringa) and mulangi (radish). Other variations include poosani kai (pumpkin), urlai kezhangu (potatoes), carrots and a very seasonal version with green mangoes...yum!

After a quick call to amma on Sunday morning, I was armed and ready with the ingredients. I had a couple of carrots completely forgotten in one corner of my fridge and I decided to put them to good use. What follows is a simple recipe of my amma's to make a sumptuous sambhar within 30 minutes.


Ingredients: (serves two)
Tuar dal - 3/4 cup
Tamarind paste - 3/4 tsp or 1/2 lemon sized chunk
Carrots (or any other vegetable of choice cut into big pieces) - 1/2 cup
Onion - 1/2 of a medium sized one
Tomatoes - 1/2 of a small one
Water - as needed
Salt - to taste

Dry masala powder:
Red chilli powder - 3/4 tsp
Coriander powder - 1.5 tsp
(or)
Sambhar powder - 2.5 tsp

For the masala paste:
Coconut (shredded) - 1 tbsp
Jeera - 1/4 tsp
Garlic - 2 or 3 cloves

For tempering:
Oil - 1 tbsp
Mustard seeds - 1/2 tsp
Fenugreek seeds - 5 or 6 nos
Hing - 1/4 tsp
Turmeric powder - 1/4 tsp
Curry leaves - a few


Method:
Sambhar:
1. Wash the tuar dal at least 3 times in running water. Cook in a pressure cooker with 2 cups water, 1/2 tsp of oil and a pinch of turmeric for 2 whistles. Set on low and cook for another 10 minutes. Switch off and let the pressure release.
2. In the meantime, place the chopped vegetables in a small vessel with 1 cup water and enough salt for just the vegetables. Let it cook completely.
3. Dissolve the tamarind paste in 1/2 cup water. If using regular block tamarind, extract the tamarind juice using 1/2 cup water and filter it to remove impurities.
4. Grind the coconut, jeera and garlic with enough water to make a smooth paste in a blender.
5. Chop the onion and tomato into big chunks and set aside.
6. Once the vegetables are cooked, add the tamarind water, enough salt for the sambhar and wait for first boil. If you are using red chilli powder and coriander powder separately, add it now to the tamarind water and let it boil once more.
7. Check the pressure cooker if it is safe to open and mash it well with a thick spoon. Add the tamarind and vegetable mix to the dal and stir until well blended. Let it boil well for at least 3 minutes.
8. Now add the coconut paste to the sambhar and wait for first boil. If you are using the sambhar powder, add it not to the sambhar and check for salt. The sambhar is ready

Tempering:
1. Use the same vessel that was used to cook the vegetables. Add oil and once it is heated, splutter the mustard seeds, add the fenugreek seeds and curry leaves. 
2. Then add the onions and fry until edges are slightly browned. Add the tomatoes and fry for just a minute or so. DO NOT over cook the tomatoes or over fry the onions.
3. Finally add the hing and turmeric and give it a quick stir. Top off the sambhar with the tempering and serve hot with steamed rice and side.

Soon to come...rotis, alu parathas and a post on southern Indian breakfast (idli & dosa)

Friday, December 16, 2011

Green Kurma - Amma's Recipe

Kurma or Korma is a common Indian curry that is a favorite amongst many. For me, personally, the only kurma that I ever liked was amma's green/white kurma. It was loaded with all kinds of vegetables and even during the days when I hated any/all kinds of vegetables, this was one kurma that I loved to eat. What made it a favorite though was the fact that this was the default kurma that you got with the Kerala paratha (another favorite of mine) in most restaurants. That's how my love for this started and amma makes an amazing version of this that I love. My bouts of homesickness have become more frequent than before, the two year mark is inching close and I miss amma's cooking the most. When I came to the US, I was arrogant since I had survived in Bangalore for 4 years. What I forgot to factor-in was of course my once-a-month trips to Pondichery that kept the homesickness in check. So without 'that', this past year and a half has been dotted with many bouts of homesickness. Or rather just foodsickness I guess. Especially amma's.

So with a few left over green beans, a couple of sad carrots and two shriveled potatoes in the corner of my fridge...I had no choice but to make a kurma. The main reason why those leftovers ended up was the biryani that I had made a couple of weeks ago (post to come soon). A quick call to amma and I had rounded up all the ingredients I needed. I even had the kasa-kasa (white poppy seeds) with me, all thanks to amma who had sent a bunch of whole spices with VJ last December. I actually have all kinds of whole spices in my spice shelf now. All of them call out to me to experiment and cook with them more often. I hope the coming 3 weeks help me find recipes using some/all of them.

Tastes best with plain ghee rice cooked with whole spices. But rotis are an equally good substitute too, especially when you are trying to lose those extra pounds.


Ingredients:
Carrots - 4
Green beans/string beans/french beans - 200 gm
Green peas - 1/2 cup
Bell pepper (only green) - 1
Potatoes - 2 to 3, medium sized
Ghee/oil - 1tbsp
Onion (chopped/ground into a paste) - 1, medium sized (optional)
Jeera (cumin seeds) - 1 tsp
Bay leaf - 1
Cinnamon - 1 inch piece
Black peppercorns (whole) - a few
Cloves - 4
Green cardomom (whole) - 1 or 2

For masala 1:
Kasa-kasa (white poppy seeds) - 1/2 tsp
Cashews (whole) - 5 nos
Milk - 1 tbsp


For masala 2:

Perunjeeragam (Fennel seeds) - 1 tsp
Coconut (shredded) - 4 tbsp
Green chillies - 6
Ginger - 2 inch piece
Garlic - 4 cloves
Pottu kadalai (fried bengal gram) - 2 tbsp
Mint and/or coriander leaves - 1 tbsp (optional)


Method:
1. Dry roast the kasa-kasa (poppy seeds) until you can smell its aroma. Warm the milk in a little katori and add the kasa-kasa (poppy seeds) to it along with the cashews. Let it soak for at least a couple of hours.
2. In the meantime, wash all the vegetable, peel and chop them into chunky pieces. You can also chop them smaller, totally upto you.
3. If you are using an onion, finely chop it. Or alternatively, you can also grind it into a fine paste. Making a paste is recommended as against chopping it.
4. Take the oil/ghee in a thick vessel and splutter jeera in it. Then add all the whole masalas and fry until you can smell their aroma. Now add the vegetables, sprinkle some water and add salt just for the vegetables. Cover and cook on low until all vegetables are done.
4. Take the coconut, pottu kadalai (fried bengal gram), perunjeeragam (fennel), ginger, green chillies and the mint/coriander (if applicable). Make a fine paste out of it using as much water as needed. This is masala 2.
5. Once the kasa-kasa (poppy seeds) and cashews are well soaked, grind them into a fine paste using milk as needed. This is masala 1.
6. Check the vegetables if they are completely cooked. Now add masala 2 and mix well. Add water as needed depending upon desired thickness of gravy. Cook for a couple of minutes. Now add masala 1, mix well and cover and cook on low for a couple of minutes or until first boil. DO NOT and I repeat DO NOT over boil the gravy at this stage. It will curdle and spoil it all. Check for salt and other seasonings.

Source:
Amma dearest...leave a comment if you have a concern with this recipe.

Monday, November 28, 2011

Moong Dal Khichdi

I spent last (this?) summer in Germany on an internship and my survival there was based on a simple policy: grocery shopping only when I completely run out of food. And my little town actually had 3 Indian restaurants. Yes, yes...you heard me right: THREE! And this was such a small town...geez, people do like Indian food. To top that, there were at least FOUR Indian grocery stores that showed up on my Google search. And Germany being what it is, all of them were accessible by bus within 10 mins. I "heart" EU for this reason. Believe me, live in the US in small towns like Columbia and you'll know. I mean, you WILL know the pain.

So I shopped in the range of 250 gm packages of lentils, 1 kg packages of basmati rice, one packet of paratha, one packet of papad...you get the drift, right? And it gave me the amazing freedom to experiment within my limited budgetary constraints. That's how on the last week of my internship, I ended up with 1/2 cup of moong dal, 1 cup rice, 1/2 an onion, 1 tomato and 2 shrivelled up green chillies forgotten in the corner of the fridge. I was flying back to good ol' 'merica on the following Saturday and I still needed 10 meals...no, 9 meals (my manager treated me to a lunch on the last day) before I had to leave. The only thing that I could think was to make khichdi...but it was too late to call amma for the recipe. Which of course had me feverishly looking up recipes online. I found one which surprisingly did not call for any extra ingredients apart from my sad leftover stash. It was surprisingly good and I remember very clearly that I was chatting with Mai a.k.a Shweth when I was cooking and we chatted about recipes...good times :)

OK...after that really long rant, what follows is a minimal adaptation of the recipe I found online. It's the easiest thing to make...believe me. And I love moong dal, so it's a win-win dish for people like moi.


Ingredients:
Rice - 1 cup
Moong dal - 1/4 to 1/2 cup
Oil - 1 tbsp
Jeera - 1 tsp
Hing - 1/2 tsp
Green chillies - 2, finely chopped
Onion - 1, medium sized
Tomato - 1, medium sized
Ginger - 1 inch piece
Garlic - 2 cloves
Turmeric powder - 1/4 tsp
Chilli powder - 1 tsp
Garam masala - 1/4 tsp (optional)
Coriander leaves (chopped) - 1/2 tsp
Water - 3 cups
Salt - to taste

Method:
1. Mix the rice and moong dal. Wash at least 3 times and set aside. You can also soak it for a little while, if needed.
2. Heat the oil in a pressure cooker and splutter the jeera. Add the chopped ginger, garlic and green chillies. Fry for 30 secs. Then add the chopped onions and fry until transparent and pink.
3. Add the asafoetida and fry for 10 secs. Now add the tomatoes and all the masalas and fry for about 5 minutes until oil separates.
4. Now add the washed rice and moong dal, 3 cups water and salt to taste. Cover and cook for 3 whistles and then set on low for another 15 minutes.
5. After the pressure has released, open the cooker and add water and salt if needed. The consistency must be slightly liquidy. Garnish with the coriander leaves and serve with plain raitha, papad and pickle.

Source:

Thursday, November 24, 2011

Bhindi Masala

Bhindi or Okra is a favorite green vegetable of mine. Amma makes a typical Southern Indian poriyal which is oh-so-simple and yummy. I especially love it with amma's rasam. Most of the recipes I have on my blog are skewed towards being Northern Indian cuisine which is a little weird given that I am actually a Tamilian a.ka. South Indian. Read here for the complete rant which had me side-tracked for about 30 mins. Yes, I DO know that I suffer from border-line ADD. And OCD. But, whatever.

Given my horribly health conscious lifestyle here, I hardly eat rice regularly anymore and so I'm always on the lookout for recipe variations of my favorite vegetables and other South Indian favorites that I can pair with rotis/phulkas. And that's exactly how I landed on this recipe. Everytime I pick out THE recipe to try, it's only because of one reason and one reason alone: I need to have ALL the ingredients in my spice shelf. I think I haven't yet reached that stage where I have begun experimenting wildly with my cooking. It's gonna take some time to get there. Until then, risk-averse me is going to stick to trying out recipes with minimal changes. So here goes!
Ingredients:
Bhindi/Okra - 1/4 to 1/2 lb
Oil - 1 tbsp
Cumin seeds - 1 tsp
Ginger-garlic paste - 1/2 tsp
Green chillies (slit) - 2
Red onion - 1 medium, halved and sliced lengthwise
Tomato - 1 small or 1/2 medium, halved and sliced lengthwise
Turmeric powder - 1/4 tsp
Red chilli powder - 1/2 tsp
Coriander powder - 1 tsp
Amchoor powder (dried mango powder) - 1 generous tsp
Coriander leaves - freshly chopped
Water- 1/2 cup
Salt - to taste

Method:
1. Wash the bhindi/okra and cut off the ends. Slit it lengthwise and chop into 1 inch pieces. Set aside.
2. Heat oil in a pan and splutter the cumin seeds. Add the ginger garlic paste and green chillies. Fry for about 30 secs and add the turmeric powder. Give it a quick stir and add the sliced onions and dry until transparent and pink. Add some salt to speed up the process and prevent the onions from burning.
3. Now add the bhindi/okra and let it cook for about 5 to 8 mins. Add the red chilli powder, coriander powder and salt to taste. Mix well, add 1/2 cup water and cover and cook for about 15 mins.
4. Add the tomatoes after it has cooked and mix. Add a little more water at this stage if you would like. Mix the tomatoes and cover and cook for another 15 mins.
5. Finally, add the amchoor powder and coriander leaves. Check the seasoning to make sure its right. Switch off the stove, cover and set aside until you're ready to eat.

I personally love this with fresh ghee phulkas. I've made some changes to the original recipe based on my judgement and personal taste. I've tried this umpteen times and love it. It's got an amazing tangy taste to it due to the amchoor powder and the tomatoes that are added at the very end. It also goes well with thayir sadham :) Yes, I am a South Indian who loves my thayir sadham...sue me!

Source:
Minimally adapted from this recipe -

Instant Papad palya

If you have had Mangalorean home food, you definately would not have missed Papad and Odi (Known as Sandige in Kannada or Fritters in English) in your meals. I managed to get this recipe of Onion Odi from Aayis recipes so that you get an idea of how it is prepared.

Here is a recipe of a quick side dish that my mom used to make from leftover Papad / Odi which goes very well with Rice and Dalitoy (Dal in Konkani cuisine). This recipe does not have a specific name due to which I have termed it as Instant Papad palya

Ingredients:

One cup of Crushed Papad / Odi (of any type)
One medium Onion chopped
One small green chilli chopped
Quarter cup coconut scraping
Quarter cup grated carrot
A pinch of salt

Mix all ingredients except crushed Papad / Odi in a bowl. Papad / Odi are generally a little salty and spicy. Adding salt and chilli is are your taste requirements. Add crushed Papad / Odi a couple of minutes before serving so that it retains its crispiness and mix well. Instant side dish ready!

Credit to my Mom for the recipe.

Monday, November 21, 2011

Puliodharai - Tamarind Rice from Southern India

MTR may disagree with me on the name here, but hey I'm a Tamilian and this is how I know it. Not as puliogare or anything else. Simple and spicy puliodharai. Especially the one we can buy from Sri Ranganathar Kovil. Everytime we make a visit to the temple, my dad and I queue up behind the long snaking line in the sun just to buy some puliodharai. To what I can recall, amma never made puliodharai from scratch. We do have an equivalent of the same that is eaten with dosas and idlis - pulikachal. It's quite a favorite and traditional recipe from Tirunelveli ( my native town). The only puliodharai we had at home was the one that came out of the famous 777 ready-to-mix jar. Other versions that I remember are the ones from Grand Sweets, Parvati Bhavan etc.

I dutifully carried a jar of 777 puliodharai paste when I came to the US. It's almost half-empty now but it somehow doesn't taste the same. I'm not sure if it's the temperature change or the water or the rice from the Indian store here or whatever. But like I said, it just does NOT taste the same. And thus began my quest to find a recipe online. After much research, I chose this recipe. Reason: I had all the ingredients it called for and it seemed minimum fuss compared to the others AND it had the ubiquitous "temple style" tag in it. So I was pretty much sold on it 'cause I really did not care much and just wanted something to try on a lazy mid-week day.


Ingredients:
Cooked rice - 2 cups
Tamarind paste - 1/2 tsp
Coriander seeds - 2 tsp
Fenugreek seeds- 1/4 tsp
Sesame seeds - 2 tsp
Channa dal - 4 tsp
Red chillies - 6
Peanuts (dry, roasted and halved) - 2 tsp
Turmeric - 1/2 tsp
Mustard seeds - 1/2 tsp
Curry leaves - a few
Asafoetida / Hing - 1/4 tsp
Gingely oil - 2 tsp
Salt - to taste

Method:
1. Heat a pan and fry the coriander seeds, fenugreek seeds and sesame seeds. Do NOT add oil to fry them. Remove and set aside to cool.
2. Add 1/2 tsp oil and fry the red chillies followed by the channa dal and peanuts. Set aside to cool.
3. Dissolve the tamarind paste in 2 tbsp water and set aside.
4. Now add the remaining oil to the pan and splutter the mustard seeds. Add the curry leaves, turmeric powder and hing followed immediately by the tamarind extract. Then add salt and let it boil for 5 mins.
5. In the meantime, grind the ingredients from step 1 into a fine powder and the ingredients from step 2 into a coarse powder separately.
6. Add the powder from step 1 to the boiling tamarind mixture. Switch off the stove and let it sit.
7. Spread out the rice in a plate or wide mixing bowl and add 1 tsp gingely oil to it and sprinkle some salt. Keep in mind that the tamarind mixture also has salt added to it.
8. Now pour the tamarind mixture over the rice and mix well. Finally add the powder from step 2. If the rice feels dry, add another 1 tsp of oil.


It helps if the rice is a little over cooked. Kinda adds to the taste. I usually eat puliodharai with plain papad or curds. Another good side dish to go with puliodharai is urlai kezhangu podi maas :) I promise I'll add the recipe soon.

Source:
Adapted minimally from this recipe -


Saturday, October 15, 2011

Dal Makhni

Update#2
So, In my search for a Dal Makhni that was a happy medium between Meena's version and Vegeyum's version, I came across this simplest version of in Sanjeev Kapoor's website. I made some tweaks and added a few of my own touches to come up with a more indulgent version for those one-off occasions. In this case, that one off occasion was Diwali and I made it for a potluck. It was liked by all and I got rave reviews from everyone :) You can find it HERE!!!
--

Update#1
I made a better version of Dal Makhni from Meena's blog here. Totally in love with it! Also, there's a free cookware giveaway. Read here for rules to participate :)

--

My first impression of dal makhni (as seen on TV and other media) was a very tasteless and overcooked dal with little to no seasoning. But when I did taste good dal makhni at Mast Kalandar in Bangalore, I was sold!

When I looked up the recipes online, they were way too complicated and the stupid social stigma associated with stocking black dal at home kept me further away from the dream. Anyways, being away from home has its benefits and I finally got to make some dal makhni at home. After the research, I knew the recipe was rich...but I was NOT prepared for this level of rich. I haven't used this much butter, ghee and cream in ONE SINGLE dish. Being a health freak, now that I have actually made this and know how much of butter, ghee and cream goes into this...I don't see myself making this often or for that matter ordering it at a restaurant too. It's seriously a crazy rich dish and personally for me, I just cannot stomach it.

Of course, I may be totally wrong here. Because the alternate name for Dal Makhni is apparently Maa Ki Dal. So it has to be a healthy too, right? There were many versions out there but I picked on one from "A Lifetime of Cooking". The recipe is supposed to be handed down from the chef of Oberoi Hotels in Bangalore. With a small prayer to the Gods that I don't die of cholesterol, I began gathering the ingredients for this dish. Hope you guys have the courage to try it too.

Ingredients:
Black Urad Dal (whole) - 300 gm
Rajma (red) - 100 gm
Channa dal - 100 gm
Ginger - 20 gm
Garlic - 6 cloves
Green chillies - 4
Salt - to taste

For the tadka:
Ghee (clarified butter) - 50 gm
Jeera - 2 tsp
Garlic - 6 cloves
Hing - 1/2 tsp
Methi seeds (fenugreek) - 1 tsp
Tomato (puree) - 200 gm

Finish:
Butter - 100 gm
Half and half (non-fat) - 30 ml
Chilli powder - 1 tsp
Garam masala - 1 tsp

(I doubled all the ingredients in the recipe EXCEPT for the ghee and butter. I also used non-fat half-and-half instead of cream. BUT, in spite of all of this...the dal was way too rich for me)

Method:
1. Soak all the dals overnight in warm water. Wash well the next day ( at least 3 times).
2. Chop the garlic, ginger and green chillies finely. Add this to the dal along with some salt and pressure cook for at least 3 whistles. Then set on low and cook for another 15 mins.
3. Once the pressure is released, open the cooked and mash the dal well. I did not drain the water since it probably has all of the proteins in it. But the real recipe calls you to drain the excess water. I think it's a judgement call here.

Tadka:
1. Heat the ghee in a heavy bottomed vessel. Add the cumin seeds and let it splutter.
2. Then add the methi seeds (fenugreek) and fry until lightly brown.
3. Now add the chopped garlic and fry until the color changes a little.
4. Add the hing and then add the tomato puree. Cook until the oil separates from the puree.
5. Now add the dal to this tadka and mix well. After it boils once, add the masalas and salt along with the butter and half-and-half. Simmer for 30 to 45 minutes until well blended.

Serve hot with rotis or steamed rice.

Source:


Usually, normal dal that I make does not last more than 4 meals in my house. But this one lasted for a week and a half. Even VJ couldn't stomach too much of this. He was completely aghast at the amount of butter that went into it. When I told him it was half of what the recipe called for, he literally went ballistic. All I say is this, try this dal at your own peril. You won't regret it once it's done. It does taste heavenly and absolutely like the dal makhni in restaurants. The only difference is now, you do know what goes into that innocent dal makhni that is served to you in restaurants.