Thursday, November 21, 2013

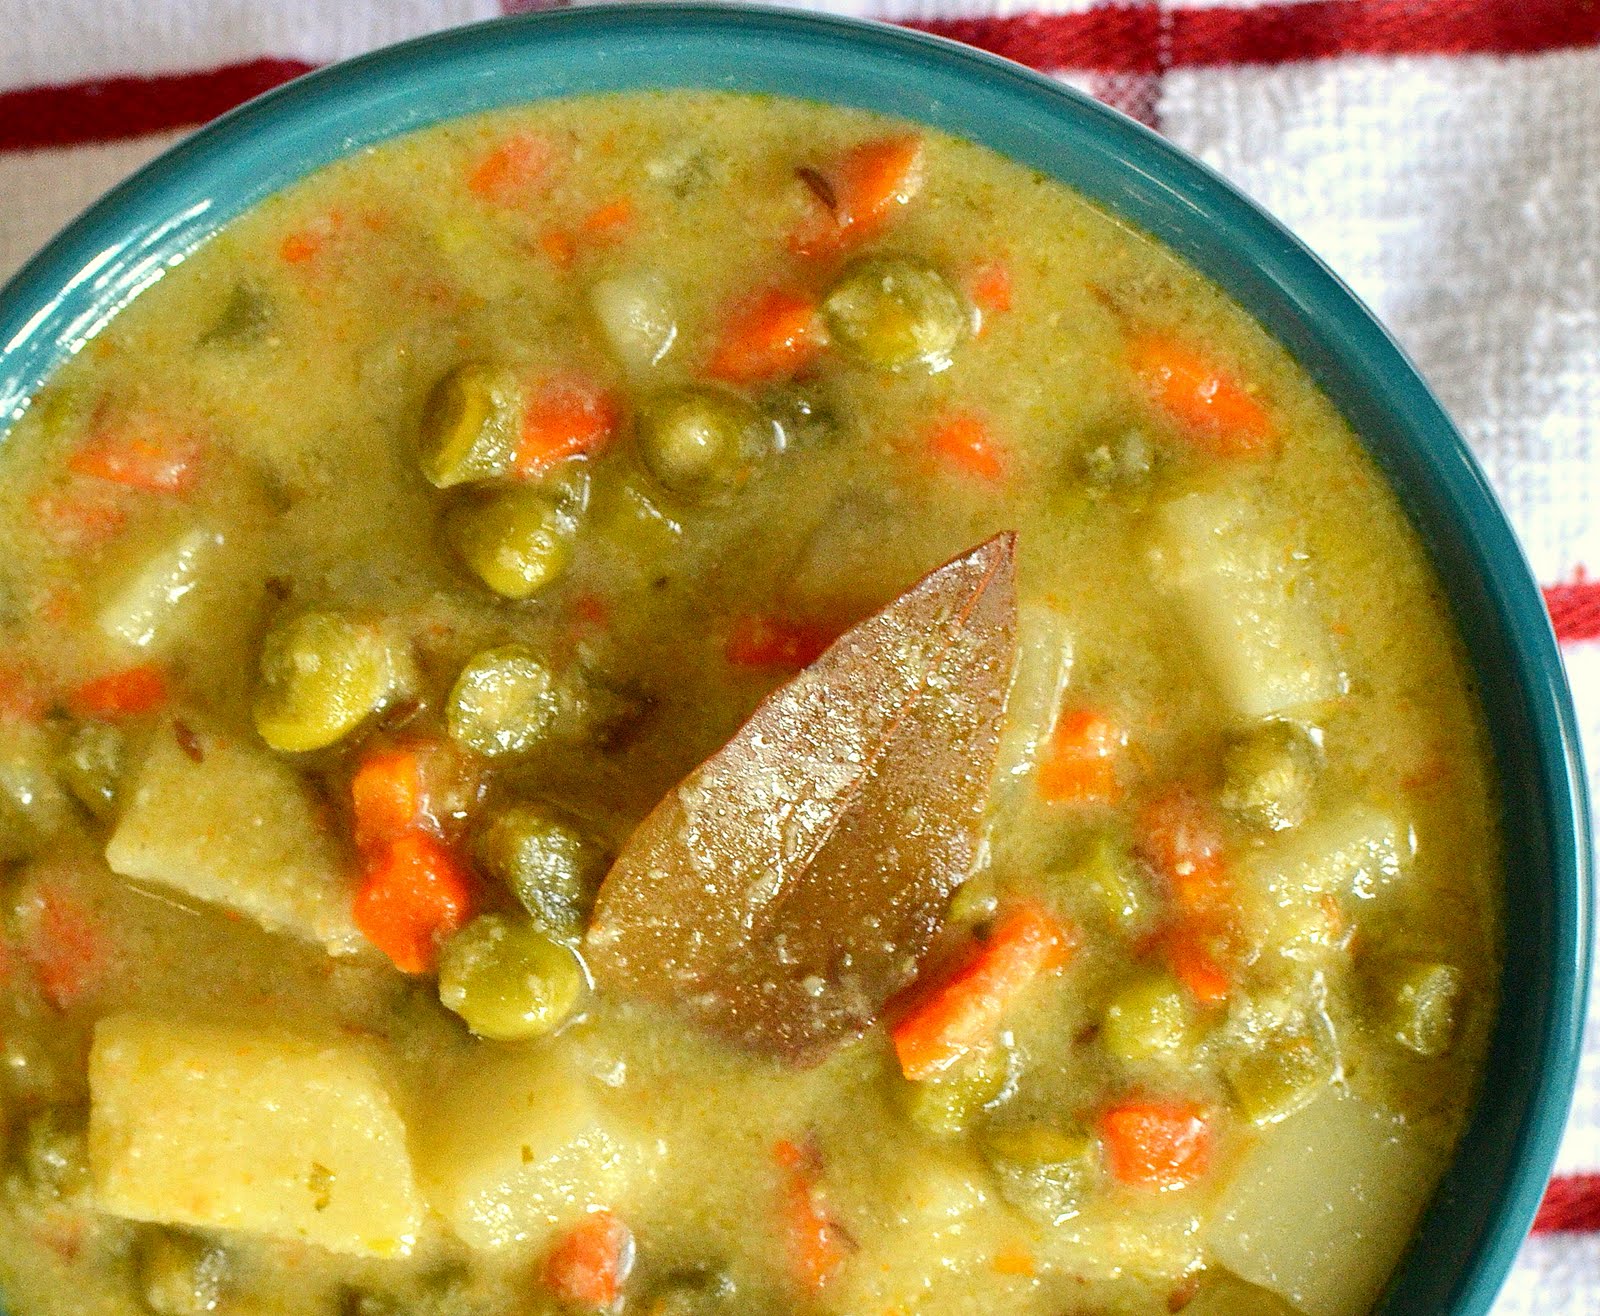
Dal Makhni V3

I made this version of Dal Makhni for a potluck - hence the 4 cups of dal measurement. I am typing this from work for a friend and have to yet modify the measurements for a family of 4, but halving all the measurements will reduce the portion for a family of 6 adults (This dal is pretty heavy to consume, so it can easily serve 6).

The dal was quite a hit at the potluck and got rave reviews...I felt very humbled. The dal has a wonderful creamy texture from the milk and the butter. The masalas are minimal since dal makhni is traditionally a very simple dal. There's really no special tricks except the BUTTER! The bay leaf adds a warm note of spice that is balanced well by the garam masala to round up the flavors and bring everything together. The potluck I cooked for was Diwali so it was fitting that the dal was this rich and flavorful.


Ingredients:
Whole black gram (sabut urad)  - 2 cups
Red kidney beans (rajma) – 1.5 cups
Chana Dal – ½ cup
Milk – 4 tbsp
Green Chillies – 6 nos
Garlic – 4 cloves
Ginger – 2 inch piece
Butter – 6 tbsp
Oil - 2 tbsp tablespoon
Cumin – 4 tsp
Bay leaf – 1 large
Onions – 1 large or 2 medium
Red chilli powder 4 tsp  
Garam masala – 2 tsp
Tomatoes – 4 medium

Method:
1. Mix all the dals together and wash in water until the water runs clear. Soak the dals overnight (at least 10 to 12 hrs).
2. Pressure cook the dals with twice the amount of water (8 cups) and 1 tsp of oil for upto 2 whistles. Then set the pressure cooker on LOW for 20 mins. Switch off and wait until the pressure releases and it’s safe to open the cooker.
3. Once the pressure is released, open the cooker and check the consistency of the dal. The kidney beans and channa dal should be ‘mashable’ between your thumb and index finger. If yes, move to the next step. If not, put the lid back on and cook for one more whistle and LOW on 15 mins.
4. Add the milk to the cooked dal and mash with the back of a spoon or ladle. You can also use a potato masher, but be careful NOT to mash it to a complete pulp.
5. Take the stems off of the green chillies, peel the garlic cloves and remove the skin of the ginger. Throw them into a blender (like a magic bullet) and pulse to a coarse consistency. Do NOT blend into a paste.
6. Chop the onions finely and puree the tomatoes to a pulp.
7. Take a thick bottomed vessel and set the heat to HIGH. Add 4 tbsp of butter and oil and wait until it’s heated.
8. Splutter the cumin and add the bay leaf, wait for 30 seconds. Be careful not to burn the bay leaf. Then add the chopped onions. Fry for a minute, then add the chilli-garlic-ginder paste and sauté until the onions are nice and transparent or until the raw smell of the ginger and garlic is gone. Add a pinch of salt to keep the onions from burning.
9. Now add the red chilli powder and the garam masala and fry for 2 mins. Be careful not to burn the masalas. Add 1 tsp of oil and ¼ tsp salt if you feel that the masala is burning.
10. Now add the tomato puree and cook on MEDIUM until the oil separates. Cover loosely with a lid to prevent the puree from spluttering out of the vessel. The tomatoes would take at least 15 mins to fully cook and release the fat.
11. Once the tomato is cooked, add the dal+milk mixture and mix well. Taste for salt and add as needed. Add water as needed at this stage until you get to your desired consistency. Dal Makhni should be semi-solid and not completely watery.
12. Set the dal to high and add 1 tbsp of butter. After the dal comes to a boil, set on MEDIUM/LOW and cook covered with a lid for 15 mins.
13. Switch off and remove from the flame. Add the final 1 tbsp of butter and chopped coriander (optional).

Notes:
Although other versions call for adding CREAM, traditional dal makhni only needs butter. Cream is a nice way to make it richer, but not necessary.
Using good quality butter really helps to bring out the taste. I have not tried this recipe with margarine or other butter substitutes.
This dal is pretty heavy on the constitution, be sure to portion control during your meal J

Source:

Sunday, April 1, 2012

Black & White

OK...wanna play a game?

I'm gonna throw some words at you and you're gonna guess what it means...ready?
- nutella - chocolate - vanilla - peanut butter - cake - cups -

Aaaaaaaaaaaaaand, what do you get?

Cupcakes!


Not just any kind of cupcake...vanilla cupcakes with nutella and chocolate cupcakes with peanut butter. I got the inspiration from this recipe on my latest addiction (Pinterest). I tried out the standard recipe and then got inspired to try out the chocolate and peanut butter version. They are super easy and came out awesome. The best part was that I made them around evening'ish which meant that the light was perfect to click some beautiful pics. I cannot believe how gorgeous they look!


Black
Ingredients:
Self rising four - 1 and 3/4 cups
Cocoa powder (dark) - 3 tbsp
Sugar - 3/4 cup
Oil - 1/4 cup
Butter - 1/4 cup
Applesauce (egg substitute) - 3/4 cup [ or 3 eggs ]
Peanut butter - 5 to 6 tsp

Method:
1. Preheat the oven at 325F and set paper liners on a 12 count muffin pan.
2. Sift the flour and cocoa powder together and set aside.
3. Beat the sugar, oil and butter until light and fluffy. Add the applesauce and mix until well blended.
4. Then add the flour mixture 1/3 of it at a time and combine together. It will be a litter thicker than normal cupcake batter.
5. Spoon out the batter equally among the 12 muffin liners.
6. Whisk the peanut butter until a little softer. You can add a few drops of milk if needed.
7. Add 1/2 tsp of peanut butter on top of each cupcake and using a knife swirl it around the top.
8. Bake in the over for 25 - 30 mins or until a skewer comes clean. Cool completely before eating.


White
Ingredients:
Self rising four - 1 and 3/4 cups
Sugar - 3/4 cup
Oil - 1/4 cup
Butter - 1/4 cup
Applesauce (egg substitute) - 3/4 cup [ or 3 eggs ]
Nutella - 5 to 6 tsp

Method:
1. Preheat the oven at 325F and set paper liners on a 12 count muffin pan.
2. Beat the sugar, oil and butter until light and fluffy. Add the applesauce and mix until well blended.
3. Then add the flour 1/3 of it at a time and combine together. It will be a litter thicker than normal cupcake batter.
4. Spoon out the batter equally among the 12 muffin liners.
5. Whisk the nutella until a little softer. You can add a few drops of milk if needed.
6. Add 1/2 tsp of nutella on top of each cupcake and using a knife swirl it around the top.
7. Bake in the over for 25 - 30 mins or until a skewer comes clean. Cool completely before eating.


Notes:
1. I used self rising flour and hence did not add any more leaveners in the batter.
2. I also skipped the vanilla and chocolate essence since I personally do not like flavoring unless it's natural like say a real vanilla bean or whatever.

Source:
Adapted from here.

Wednesday, March 7, 2012

Butter Gobhi - cauliflower curry in a buttery gravy

Found this recipe of Kulsum on Pintrest and was drooling over it ever since. I found some gobi on sale that day and stocked up with a single minded mission to try it out. My sister and I love gobhi and are always up for trying different versions of it. I was particularly drawn to this one because of how both the gobhi and the masala are cooked separately in masalas and then combined together for a slow cooked end.

But the biggest surprise out of this curry was the fact that VJ ate gobhi. Yes, VJ. The guy who swore off gobhi as a stinky, smelly vegetable that tastes like mulch. And now, he asked me to make the same curry again and wants to eat the whole batch with my mutter pulao.


I tell you, this curry has the miraculous power to cure. I witnessed it myself. It cured VJ.

Anyways, without boring you further I'll get down to the recipe itself. I followed her recipe truthfully with a few exceptions:
1) I skipped the black cardamom and tomato paste since I had none.
2) I also substituted the kala jeera with normal jeera. 
3) I had no cream at home and used a extra 1 tbsp of butter in 2 tbsp of 2% milk, microwaved together for about 30 seconds (3 turns of 10 seconds each)
4) The chilli powder I use is kashmiri and hence it didn't pack the punch. So I chopped one green chilli and added it to the curry at the last stage.
5) I also made the gravy first and set it cool while frying the gobhi. 


Ingredients:
Gravy:
Onion - 1 large
Tomatoes - 2 large
Ginger garlic paste - 2 tsp
Red chilli powder - 1 tsp
Coriander powder - 1 tbsp
Garam masala - 1 tsp
Turmeric powder - 1/2 tsp
Cashew nuts (crushed) - 1 tbsp
Butter - 3 tbsp
Bay leaf - 1
Green cardomom - 1 (crushed)
Cumin - 1/2 tsp
Cinnamon - 2 inch piece
Cloves - 2
Salt - to taste
Water - 1 cup

Gobhi:
Cauliflower - 1 head
Ginger garlic paste - 1 tbsp
Red chilli powder - 2 tsp
Garam masala powder - 1 tsp
Salt - to taste
Water - 1/2 cup
Butter - 1tbsp

To finish:
Green chilli - 1, chopped
Half and half - 2 tbsp
Kasoori methi - 1 tsp


Method:
Gravy:
1. Chop the onions and tomatoes finely and set aside.
2. Heat the butter in a thick bottomed pan and add the bay leaf, cardamom, cloves, cumin and cinnamon. Fry for about 10 secs until you can smell the aroma of the spices.
3. Add the onions with a pinch of salt and fry until golden. Then add the ginger garlic paste and fry until well blended and the raw smell fades.
4. Now add all the masalas (turmeric, red chilli, coriander, garam masala and crushed cashews) and mix well. Add the tomatoes and salt and cook until it forms a well blended, mushy paste. 
5. Now add 1/2 a cup water and let it boil for about 10 mins. Transfer to a wide bowl and set it to cool completely.

In the meantime, we will fry the gobhi.

Gobhi:
1. Peel off the leaves and break/cut the cauliflower in big pieces. Wash in a colander under hot running water for about 2 mins.
2. Drain and transfer to a big bowl and add the ginger garlic paste. Mix into the florets uniformly. Now add the red chilli, garam masala and salt and mix well until well blended.
3. Using the same pan, heat the butter and add the florets to it. Fry until lightly browned. 
4. Add the half cup water to it and cook with the lid on for about 7 mins. Take care not to overcook and make the florets mushy. It has to just cook through.


To finish:
1. Remove the bay leaf from the cooled gravy and blend into a fine paste.
2. Add this to the cauliflower along with 1/2 cup water and the chopped chillies. Check for salt and cook for about 10 mins or so with the lid.
3. Finally add in the cream and kasoori methi. Serve with rice and/or roti, nan etc.

Source:

Monday, March 5, 2012

Pav Bhaaji - Indian Street Food

Before VJ came to the US, he attended a bunch of cooking classes with a lady whom he fondly calls as "Usha Aunty". And he came armed with a notebook full of quick recipes from her that, for all obvious reasons, had one for pav bhaaji. It's one of VJ's favorite foods right next to a good ol' grilled veggie sandwich - from South Bombay :)

VJ has made this recipe many times over and it has come out in absolute perfection each time. It's one of the recipes for which we actually went out of our student-budget-ways to stock up a secret ingredient. This secret ingredient makes this recipe what it is. I haven't personally met Usha Aunty, but she is the rightful owner of this recipe and I owe countless happy meals to her. We always buy the squarish dinner rolls from the supermarket and just toast them with butter on a pan for the pav.


To start off with a little background on Pav Bhaaji, it's a typical Indian street food and has 2 main components: the bhaaji, which is the potato based almost-liquidy curry and the pav, which is baked bread similar to dinner rolls. But what makes the pav bhaaji a real treat is the garnishing; it's always served with freshly chopped red onions, generous sprinkling of lemon juice and loads of butter. This dish is one of those rare occasions where I turn a blind eye to the amount of butter used and just give in to the pleasure of devouring it like a child with no health concerns. And let me tell you this, it is sooooo worth it!

To read more on pav bhaaji, see here.


Ingredients:
For the bhaaji:
Potatoes - 6 large
Green peas - 1 cup
Green pepper - 1, finely chopped
Tomatoes - 6 medium (roma) or 4 medium (hot house/vine)
Onion - 1 large (preferably red)
Garlic - 6 cloves
Ginger - 2 inch piece
Green chilli - 2
Butter - 3 tbsp + 2 tbsp
Oil - 1 tbsp

Masala:
Red chilli powder - 2 tsp
Coriander powder + Jeera powder - 1 tsp
Pav bhaaji masala - 1 TBSP
Asafoetida - 1/8 tsp (a generous pinch)
Black salt - 1 tsp
Cilantro - 2 tbsp, chopped
Salt - optional, to taste 
Secret ingredient - 1/2 tsp (optional, adjust according to taste)


For the pav:
Dinner rolls - pack of 12
Butter - 2 tbsp

Method:
1. Boil the potatoes (peeled), peas and capsicum (chopped) in enough water until well cooked. It's ok to be a little overcooked. Cool and mash well using a potato masher. Set aside.
2. Make a paste of the onion, ginger, garlic and green chilli. Set aside.
3. Puree the tomatoes. Set aside.
4. Heat the oil and butter in a thick bottomed pan and fry the onion paste until the oil separates. 
5. Add the tomato puree and cover with lid and cook once again until the oil separates. This is an important step as it brings out all the tanginess in the tomatoes. But it has to cook well. Also, it's a little messy. So it's good to cover it with a lid and let it cook.
6. Now add all the masalas, black salt, the secret inredient and the coriander leaves (you can save some as garnish). Cook for 5 - 10 mins.
7. To this, add the mashed veggies and mix well. You can add water at this stage to get a almost liquidy consistency. But if you do add water, adjust the masalas and salt accordingly.
8. Garnish with a few drizzles of lemon juice and a side of freshly chopped onions.


For the pav, slice the dinner rolls like a biscuit and butter both sides. Toast on an open pan until the sides are slightly browned. Make them on the spot for guests. The bhaaji can be refrigerated for upto 2 days.

Source:
Usha Aunty :)


Sunday, February 26, 2012

Baked Rotini with Roasted Tomato-Garlic Sauce

Remember how I told you about the fact that I like to work out to de-stress? The next top choice of course is cooking. And not just making my usual safe dishes, but trying out weird variations of (my) standard recipes. And the best part is that I am super-motivated while trying out variations, thus taking real cool pictures and then discussing the pros and cons of the recipe with VJ and my sis.


So tonight, after a particularly stressful week that was unfortunately further marred by snowstorms and closed airports, I decided to re-visit my arrabbiata sauce. I roasted the tomatoes and garlic in the oven and fried the onions to a burnt brown in the pan. And then I used my standard trick of tomato soup to finish it off. Finally, layered it all and baked it to a perfect finish :)


Ingredients:
Garden Rotini pasta - 2 cups (uncooked)
Roma tomatoes - 2
Garlic - 4 cloves
Onion - 1 medium
Tomato soup (plain) - 1 can
Oil - 1 tsp
Butter - 1 tbsp
Red chilli powder/flakes - 1 tsp (reduce to 1/2 for a milder sauce)
Italian seasoning - 1.5 tsp
Pepper powder - 1/2 tsp (optional)
Italian cheese mix - 1/4 cup
Salt - to taste
Water - to boil the pasta
Baking dish - 9" x 9"


Method:
1. Bring the water to full boil in a wide vessel and cook pasta to al dente. Drain and set aside.
2. Slice the tomatoes in half, lengthwise and set on the baking dish. Drizzle with the oil and add the garlic pods (with skin) and set in the pre-heated oven at 450 F for 20 mins. After it's done, set aside to cool.
3. In the meantime, slice the onion into thin strips and fry with the butter and a little sprinkling of salt until well browned and just before almost burnt. Set aside to cool.
4. Pulse the cooled tomatoes and the garlic (after peeling) to a chunky paste and set aside.
5. Similarly, pulse the cooled onions to a chunky paste and set aside.
6. Using the same pan as the fried onions, fry the tomato paste for 30 secs. Add the red chilli powder, italian seasoning and the pepper powder and fry for another 30 secs.
7. Then add the pulsed onions and fry for 1 minute. Finally add the can of tomato soup and salt. Check the seasoning and let it cook for about 5 to 8 mins.


To assemble:
1. Layer the pasta on the dish.
2. Pour the sauce over the pasta.
3. Sprinkle the cheese on top.
4. Cover with foil and bake at 375 F for 15 mins.


Source:
None to cite. Just followed a basic arrabbiata recipe with minor variations. Although, the idea for roasting the tomatoes came from here :)


Chocolate Chip Muffins - my first baking post

So…after all this while, I finally have a ‘baking’ post. It’s kinda weird given that I started baking really young while helping out mom when she made our birthday cakes and loads of other versions of basic sponge cake. The most famous one that gets made most is the coffee cake which my dad absolutely loves.

What’s even weird is that I bake ALL.THE.TIME. Yet, I never took pics and hence the post never materialized. This time around, I was adamant and made VJ click pics even as he started munching on the muffins.


So why chocolate chip muffins? I remember seeing this episode of Nigella Lawson on TLC oh-so-long-ago and was dying to try it out. The problem with baking for VJ is that since he doesn’t eat eggs, I have to use substitutes. And although I have a couple of good tricks up my sleeve, I always hesitate wondering if it would turn out right? Or just collapse on me? Or not rise at all? Or harden completely? I decided to put all of those thoughts to hell and went ahead and just baked a batch. Now VJ wants then literally every week. I baked this batch before I flew out of town for some work and VJ finished them in 2 days straight. It was originally intended to last him 4 days.
But I will tell you this, it’s a fool-proof recipe and anyone can bake them with their eyes closed. Literally.


Ingredients:
Self rising flour – 1 and ¾ cups
Sugar – ¾ cup ( I use brown)
Chocolate chips – ¾ cup
Oil – 1/3 cup plus 2 teaspoons ( don’t ask me why)
Unsweetened apple sauce (egg substitute) – ¼ cup (thumb rule: 1 egg = ¼ cup sauce)
Milk - ½ cup


Directions:
1. Pre-heat oven to 400 F. Line a muffin pan with paper liners or grease them using non-stick cake grease.
2. Measure out all the dry ingredients and set aside in separate bowls.
3. Measure out the wet ingredients and add them to a big mixing bowl. Mix together by hand until well blended and lightly frothy.
4. Now add the sugar and mix again until well blended.
5. Add the flour to this mixture in 3 batches, mixing it well after each time.
6. Finally, stir in the chocolate chips.
7. Spoon out into muffin cases (2/3 full) and bake for 20 mins or until a skewer comes clean.


Note:
1. I did not use any baking powder or baking soda as I use self-rising flour and have never had to add extra leaveners.
2. The original recipe calls for 1 cup milk, but in the video I remember seeing the batter being too runny. I did NOT want that and used just ½ cup milk. The muffins turned out fine.
3. I skipped the cocoa powder as VJ likes plain vanilla muffins with chocolate chips. For some reason, he hates double chocolate chip muffins.
4. Oh, I also skipped the vanilla essence as I’m kinda picky about artificial flavoring and the store bought essences are way too strong for my taste. Once I get done being a penny pinching student, I’ll buy vanilla bean pods and add them to my sugar container for natural flavoring. Ha!


Source:

Tuesday, February 7, 2012

Guacamole & Baked Crackers

Guac is my favorite to-go snack on Saturdays. No idea why. When the clock creeps towards 5 pm and I start craving my coffee or tea; I need to munch on guac and crackers. Totally love it. IMHO, its better with tea than coffee :)

I usually buy any kind of multi-grain chips at the store. But I wanted to try the baked cracker chips from Pepperidge for a long time and picked up a pack at Target the other day. Loved it! Now I am busy hunting coupons for those crackers whenever I can find them.

So here goes!


Ingredients:
Avocado (ripe & soft) - 3 nos.
Red onion - 1/2 of a small one
Tomato - 1/4 to 1/2 depending on the size
Green chillies - 1
Coriander leaves - a few
Lemon juice - 1 tsp
Cumin - a pinch
Salt - to taste

Method:
1. Cut, pit and scoop out the avocado in a good size mixing bowl. Mash using a fork or large spoon. You can also use a pototo masher. I like to keep my guac a little chunky, so I just use a fork.
2. Dribble the lemon juice over the avocado to keep it from getting dark.
3. Quickly chop the onion and tomato into small, fine pieces. Slit and then chop the green chilly into tiny pieces (use with seeds). Also cut the coriander leaves.
4. Add salt and cumin to the avocado and give it a quick mix. Finally add in the onion, tomato, chilly and coriander.
5. Adjust for salt and other seasoning (cayenne, pepper etc.)

Source:
Some good soul in Mexico eons ago :)


Saturday, February 4, 2012

Chole & Poori

Long pending post and can't believe I'm finally getting this done. Chole is one of my favorite, to-go currys ever. It's easy and super tasty; not to mention the fact that garbanzo beans are protein-packed. That's another reason why I love channa chat salad; its the best dinner or snack while on a diet.

But the unfortunate aspect about making chole is that it makes you crave for poori :( And this totally defeats the whole healthy and easy gig that I just played out. But, whatever. You gotta do what you gotta do :)

One thing to mention before I start with the recipe is about the chole masala that I use. It's home-made by my sister who got the recipe from a friend of hers. The main secret ingredient is the black cardomom; it gives the chole that darker color and the aroma. The next secret ingredient is black peppercorns that lends the sharp and strong heat to the whole curry. I do not unfortunately have the exact list of ingredients or the proportions. I will post it soon another time once my sister and I can actually figure out a way to get the recipe. And we better do it fast 'cause we're almost out of the spice. In the meantime, I'm gonna use regular chole masala off-the-shelf. I personally recommend MDH. Please do NOT buy Everest.

I made this in the middle of the week and had no time to take nice pics. All I managed to do was a click one on VJ's phone cam. I guess something is better than nothing. Also, my pooris fell flat as soon as I made them cause I didn't add enough sooji and sugar. But the recipe is still good if you follow the proportions right.


Ingredients:
Garbanzo beans/chickpeas - 2 cups (uncooked)
Water - 4 cups + more, as needed, for the gravy
Onion - 1 large
Tomato - 1 large
Green chillies - 4, spicy hot
Ginger - 3 inch piece
Garlic - 2 cloves
Chole masala - 2 to 3 teaspoons
Oil - 2 tbsp
Jeera - 2 tsp
Bay leaf - 1 small
Black peppercorns (whole) - few
Coriander leaves (optional) - fistful, chopped
Salt - to taste

Method:
1. Wash and soak the chickpeas overnight in warm water. Rinse and throw away the soaked water the next day. Cook with 4 cups water in a pressure cooker for 2 whistles and then on LOW for 10 mins.
2. Cut the ginger into strips, save 1/3 of it for later. Also cut the garlic into strip and slit the green chillies.
3. Finely chop the onions and puree the tomato.
4. Add oil in a big kadai and splutter the jeera once it's hot. Add the bay leaf and black peppercorns, stir for 30 secs. Then add the 2/3 of ginger, all the garlic and green chillies. Fry until lightly browned.
5. Add the onions and 1/2 tsp of salt. Fry the onions until lightly browned.
6. Then add the chole masala and quickly stir for 30 secs. Be careful not to burn the masala.
7. Add the tomato puree and cook, with a lid, until oil separates. Add 1 cup water and cook the masalas once more for 15 mins until the gravy is well blended.
8. Finally add the cooked chickpeas, water and salt to taste. Cover and cook on low for 30 mins. Stir in the saved ginger strips, mix and serve with hot pooris :)

Source:
None to cite. If you have an issue, please leave a comment.


Saturday, January 21, 2012

Capsicum Poriyal - Andhra Style

First things first, capsicum is green bell peppers for all my American friends.

I found them on sale at Food Lion and grabbed as many as I possible could. This is my biggst gripe in shopping for fresh green vegetables here. Unless I go to a farmer's market or shop organic by paying insanely high prices, there is no way that I can actually buy fresh green vegetables. And it's just not easy on a student budget.


So anyways, I guess I was lucky and last weekend with two hungry souls to feed and less than an hour's time to cook before both of them became super-grumpy, I came up with this recipe. I made it up as I went and the inspiration came from a buffet at The Woodlands where we stopped to re-fuel in Orlando, FL before we started our roadtrip back home to Columbia, SC. That version had a lot of vegetable and I tried to do the same with just the green peppers and in the end threw in a potato just to be on the safer side. It was run by people from the southern state of Andhra Pradesh.

The irony behind all of this however was the fact that both the grumpy souls loved the dish and have been bugging me to make more. After this uber-long rant, lets finally get to the recipe, shall we?


Ingredients:
Green bell peppers - 4
Potato - 1 medium size
Onion - 1 medium size
Tomato - 1 medium size
Curry powder - 3 tsp
Oil - 3 to 4 tbsp
Mustard seeds - 1 tsp
Curry leaves - a few
Bay leaf - 1 small
Channa dal & Urad dal (whole) - 1 tsp

Masala:
Coconut (shredded) - 2 tbsp
Fennel seeds - 1/2 tsp
Red chillies (dried) - 8 (Rule of thumb: 2 per green pepper)
Roasted peanuts - 4 tbsp (Rule of thumb: 1 tsp per green pepper)
Ginger - 1 inch piece
Garlic - 4 cloves (Rule of thumb: 1 per green pepper)

Method:
1. Grind all the ingredients for the masala into a smooth paste with as much water as needed. Set aside.
2. Cut the green bell peppers into big one inch piece cubes. Chop onions and tomatoes finely. Peel and cut the potato into big cubes.
3. Add oil in a big dutch oven and splutter the mustard seeds in it. Add the curry leaves, bay leaf and then the onions. Fry until browned on the edges. Then add the tomatoes and fry until cooked to a pulp. Continue frying until the oil separates. Add the curry powder and stir it in.
4. Finally add the green peppers and cook until half done. Then add the potatoes and cook until well done. Add water if needed at this stage.
5. To finish off, add the ground paste and cook on low for about 15 minutes, covered with a lid.

Goes well with plain rotis or paratha or plain steamed rice.


Source:
No source to cite here as I made this up as I went. Please leave a comment if you have a concern.

Wednesday, December 21, 2011

Palak Dal

I've had many friends from the land of the Gultis, as I affectionately call them. Which is interesting 'cause many others think of it as very offensive. To me personally, I had no strong parochial sentiments against people from other states and so I never used it in an offensive way. It was just an affectionate way of referring to them. But anyways, their cuisine is very rich and wonderfully flavorful. The best dishes are the various dals/lentils that they make. Having only been used the sambhar version of making lentils, I found their dals to be a treat. Totally in love with them. 

And it was such a friend who taught me this easy-breezy version of Palak Dal. It was a no mess recipe which was no wonder cause he's a guy. At that point I was living in Germany temporarily on project work and he lived in the nearby guesthouse. I got the recipe from him when we had a pot-luck dinner together. I've tried it many times and made minor changes to it depending on my taste. I've got it down to a perfect version now and it's a favorite of now just VJ but also Gabi, Marina and so many other friends who've tried it.


Ingredients:
Tuar dal/ Moong dal - 2 cups
Spinach (frozen or fresh - chopped) - 1 cup
Onion - 1 large
Tomato - 1 medium
Tamarind paste - 1/2 tsp (optional)
Oil - 1/2 tsp
Turmeric powder - a pinch
Salt - to taste

For tempering:
Oil - 1 tbsp
Jeera - 2 tsp
Green chillies/Red chillies (based upon your taste) - 4
Ginger - 2 inch piece
Garlic - 2 cloves
Red chilli powder - 2 tsp
Croainder powder - 4 tsp


Method:
1. Cut the onion and tomatoes into 1 inch pieces.
2. Defrost the spinach.
3. Wash the dal at least 3 times in clear running water and place in a pressure cooker.
4. To the above, add the spinach, onion and tomatoes with a pinch of turmeric, 1/2 tsp oil and the tamarind paste (if using).
5. Cook for 2 whistles and then on low for 15 mins. Switch off the stove and wait for pressure to release.

For tempering:
1. Finely chop the ginger, garlic and green chillies. If  using red chillies, break them into pieces and set aside.
2. Heat oil in a small kadai and splutter the jeera in it.
3. Add the ginger, garlic and chillies and fry unitl lightly browned. The trick here is to get a slightly burnt taste - BUT don't ACTUALLY burn them.
4. Switch off the stove and move the kadai to a cold stove. Now add all the dry masalas and give it a quick stir so that it is mixed with the oil. Leave in the kadai for about 30 secs.
5. Add this tempering to the dal with salt to taste and mix well. Add water as needed to get it to the consistency of your choice. It's better to keep this dal thick - tastes much better that way.

Serve with hot ghee phulkas or plain rice with lots of ghee Ã  la Gulti style :) 

Monday, December 19, 2011

Alu Paratha

Remember how I told you about this hotel called Surguru in my hometown Pondichéry? And how that was where I started eating a different cuisine apart from the typical sambhar-saadham-poriyal that I was used to? Well it was also in that same hotel that I was introduced to the stuffed nan. I "hearted" it from the very first time and once I started cooking, I was always curious about how I could achieve the same results in my own tiny kitchen. The experiments started with layering a vegetable mash in between two rotis and trying to seal them and cook them all the way to rolling two rotis together with stuffing in between. It was on a lazy weekend afternoon that I came across this cookery show where I saw the step-by-step process of making a paratha. I tried it out the very next day and it was a hit! The naive 12 year old me couldn't believe that I had actually gotten it right...finally :)

So what follows is a alu paratha recipe that I have tried and perfected over the years. I still have two distinct recipes for the stuffing that I follow. Both of course are a favorite with VJ and it's also the default lunch of his choice on his b'day every year :)


My recipe is mostly going to focus on the stuffing. VJ was actually helping me, so we couldn't take pictures while I actually rolled and made the paratha. I will update this post with the step-by-step pictures once I manage to get some.

Ingredients:
Atta - for 10 rotis
Potatoes - 4 medium sized ones

For stuffing 1:
Oil - 1 tbsp
Jeera - 2 tsp
Turmeric - 1/4 tsp
Red chilli powder - 2 tsp
Coriander powder - 2 tsp
Green chillies - 4
Hing - a pinch
Coriander leaves - 1 tbsp (optional)
Salt - to taste

For stuffing 2:
Oil - 1 tbsp
Whole red chillies - 8 (Rule of thumb: 2 chillies per potato)
Whole coriander seeds - 4 tsp
Jeera - 2 tsp
Turmeric powder - a pinch (optional)
Kasoori methi - a generous pinch
Salt - to taste

Method:
1. Wash and cut the potatoes in half - along the width. Take a vessel with 2 cups of water and cook the potatoes in it until they are cooked through. You can check using a fork.
2. Then immerse them in cold running water, peel and mash them while they are still hot enough to handle.
3. Add salt to the potatoes, mix well and set aside to cool.

For stuffing 1:
1. Slit the green chilllies and then finely chop them. Set aside.
2. Heat oil in a pan and splutter the jeera.
3. Add the green chillies and fry until they are browned. Switch off the stove and place the pan on a cold stove.
4. Now add all the dry masalas and mix well into the oil. Add this to the mashed potatoes and the coriander leaves. 
5. Mix it all together until well blended. If the potatoes are too dry, sprinkle some water and blend well. The stuffing is ready. Make round patties of the stuffing and set aside.

For stuffing 2:
1. Dry roast the coriander seeds and 1 tsp of jeera in a pan along with the red chillies for about a minute or so.
2. Once they are cooled, grind them coarsely in a blender.
3. To this add the pinch of turmeric (optional).
4. Heat the oil in a pan and splutter the remaining 1 tsp of jeera. Switch off the stove, add the coarsely ground masala and give it a quick stir.
5. Add this to the potatoes along with the kasoori methi and mix well until it is all well blended. The stuffing is ready. Make round patties of the stuffing and set aside.


To make the paratha:
1. Take a large pinch of the atta and make a rough-flattened patty. A good rule of thumb is to use 1.5 times the atta required to make a normal roti.
2. Flatten the patty with your hands (or belan) to accomodate the stuffing patty. Place the stuffing patty and bring the atta around it to seal.
3. Slightly press down and dust it with some dry flour. Roll it out like you would a normal roti. But take care that the stuffing doesn't spill out or break through the atta. If there are a few weak spots, dust those areas generously with dry atta and continue to roll it out.
4. To cook the paratha, heat a pan on high until hot. Sprinkle some oil and slide the paratha in the pan with the thick atta side facing the pan first. Sprinkle more oil on the other side and round the edges. After about 30 seconds, flip the paratha.
5. Continue to flip the paratha cooking for roughly 30 to 45 seconds on each side. Add oil if it is too dry. The paratha is done when you can see it change color all over the surface with brown spots. There shouldn't be any patch in the color of uncooked atta.

Serve hot with a dollop of salted butter, plain yoghurt and Indian pickle.

Sunday, December 18, 2011

Arachu-vitta Sambhar - Virundhu Saapadu Series

As a kid I never liked sambhar. I was the lone one battling it out on the rasam-team. But my tastes changed for the good and now the thing I miss the most is simple, home-made sambhar of amma. To tell you the truth, I miss my dad's version of sambhar more than my amma's - his sambhar has a very distinct taste to it and I can tell from just the aroma who made the sambhar. I miss dad :(

But one version of a sambhar that I liked even in my rasam-team days was the arachu-vitta sambhar. It has a unique flavor to it and is much thicker than normal sambhar; mainly due to the grated coconut paste that's added to it. This recipe is a typical Tirunelveli version. Usually sambhar is made with some kind of vegetable in it. My favorites are murungakkai (moringa) and mulangi (radish). Other variations include poosani kai (pumpkin), urlai kezhangu (potatoes), carrots and a very seasonal version with green mangoes...yum!

After a quick call to amma on Sunday morning, I was armed and ready with the ingredients. I had a couple of carrots completely forgotten in one corner of my fridge and I decided to put them to good use. What follows is a simple recipe of my amma's to make a sumptuous sambhar within 30 minutes.


Ingredients: (serves two)
Tuar dal - 3/4 cup
Tamarind paste - 3/4 tsp or 1/2 lemon sized chunk
Carrots (or any other vegetable of choice cut into big pieces) - 1/2 cup
Onion - 1/2 of a medium sized one
Tomatoes - 1/2 of a small one
Water - as needed
Salt - to taste

Dry masala powder:
Red chilli powder - 3/4 tsp
Coriander powder - 1.5 tsp
(or)
Sambhar powder - 2.5 tsp

For the masala paste:
Coconut (shredded) - 1 tbsp
Jeera - 1/4 tsp
Garlic - 2 or 3 cloves

For tempering:
Oil - 1 tbsp
Mustard seeds - 1/2 tsp
Fenugreek seeds - 5 or 6 nos
Hing - 1/4 tsp
Turmeric powder - 1/4 tsp
Curry leaves - a few


Method:
Sambhar:
1. Wash the tuar dal at least 3 times in running water. Cook in a pressure cooker with 2 cups water, 1/2 tsp of oil and a pinch of turmeric for 2 whistles. Set on low and cook for another 10 minutes. Switch off and let the pressure release.
2. In the meantime, place the chopped vegetables in a small vessel with 1 cup water and enough salt for just the vegetables. Let it cook completely.
3. Dissolve the tamarind paste in 1/2 cup water. If using regular block tamarind, extract the tamarind juice using 1/2 cup water and filter it to remove impurities.
4. Grind the coconut, jeera and garlic with enough water to make a smooth paste in a blender.
5. Chop the onion and tomato into big chunks and set aside.
6. Once the vegetables are cooked, add the tamarind water, enough salt for the sambhar and wait for first boil. If you are using red chilli powder and coriander powder separately, add it now to the tamarind water and let it boil once more.
7. Check the pressure cooker if it is safe to open and mash it well with a thick spoon. Add the tamarind and vegetable mix to the dal and stir until well blended. Let it boil well for at least 3 minutes.
8. Now add the coconut paste to the sambhar and wait for first boil. If you are using the sambhar powder, add it not to the sambhar and check for salt. The sambhar is ready

Tempering:
1. Use the same vessel that was used to cook the vegetables. Add oil and once it is heated, splutter the mustard seeds, add the fenugreek seeds and curry leaves. 
2. Then add the onions and fry until edges are slightly browned. Add the tomatoes and fry for just a minute or so. DO NOT over cook the tomatoes or over fry the onions.
3. Finally add the hing and turmeric and give it a quick stir. Top off the sambhar with the tempering and serve hot with steamed rice and side.

Soon to come...rotis, alu parathas and a post on southern Indian breakfast (idli & dosa)

Friday, December 16, 2011

Green Kurma - Amma's Recipe

Kurma or Korma is a common Indian curry that is a favorite amongst many. For me, personally, the only kurma that I ever liked was amma's green/white kurma. It was loaded with all kinds of vegetables and even during the days when I hated any/all kinds of vegetables, this was one kurma that I loved to eat. What made it a favorite though was the fact that this was the default kurma that you got with the Kerala paratha (another favorite of mine) in most restaurants. That's how my love for this started and amma makes an amazing version of this that I love. My bouts of homesickness have become more frequent than before, the two year mark is inching close and I miss amma's cooking the most. When I came to the US, I was arrogant since I had survived in Bangalore for 4 years. What I forgot to factor-in was of course my once-a-month trips to Pondichery that kept the homesickness in check. So without 'that', this past year and a half has been dotted with many bouts of homesickness. Or rather just foodsickness I guess. Especially amma's.

So with a few left over green beans, a couple of sad carrots and two shriveled potatoes in the corner of my fridge...I had no choice but to make a kurma. The main reason why those leftovers ended up was the biryani that I had made a couple of weeks ago (post to come soon). A quick call to amma and I had rounded up all the ingredients I needed. I even had the kasa-kasa (white poppy seeds) with me, all thanks to amma who had sent a bunch of whole spices with VJ last December. I actually have all kinds of whole spices in my spice shelf now. All of them call out to me to experiment and cook with them more often. I hope the coming 3 weeks help me find recipes using some/all of them.

Tastes best with plain ghee rice cooked with whole spices. But rotis are an equally good substitute too, especially when you are trying to lose those extra pounds.


Ingredients:
Carrots - 4
Green beans/string beans/french beans - 200 gm
Green peas - 1/2 cup
Bell pepper (only green) - 1
Potatoes - 2 to 3, medium sized
Ghee/oil - 1tbsp
Onion (chopped/ground into a paste) - 1, medium sized (optional)
Jeera (cumin seeds) - 1 tsp
Bay leaf - 1
Cinnamon - 1 inch piece
Black peppercorns (whole) - a few
Cloves - 4
Green cardomom (whole) - 1 or 2

For masala 1:
Kasa-kasa (white poppy seeds) - 1/2 tsp
Cashews (whole) - 5 nos
Milk - 1 tbsp


For masala 2:

Perunjeeragam (Fennel seeds) - 1 tsp
Coconut (shredded) - 4 tbsp
Green chillies - 6
Ginger - 2 inch piece
Garlic - 4 cloves
Pottu kadalai (fried bengal gram) - 2 tbsp
Mint and/or coriander leaves - 1 tbsp (optional)


Method:
1. Dry roast the kasa-kasa (poppy seeds) until you can smell its aroma. Warm the milk in a little katori and add the kasa-kasa (poppy seeds) to it along with the cashews. Let it soak for at least a couple of hours.
2. In the meantime, wash all the vegetable, peel and chop them into chunky pieces. You can also chop them smaller, totally upto you.
3. If you are using an onion, finely chop it. Or alternatively, you can also grind it into a fine paste. Making a paste is recommended as against chopping it.
4. Take the oil/ghee in a thick vessel and splutter jeera in it. Then add all the whole masalas and fry until you can smell their aroma. Now add the vegetables, sprinkle some water and add salt just for the vegetables. Cover and cook on low until all vegetables are done.
4. Take the coconut, pottu kadalai (fried bengal gram), perunjeeragam (fennel), ginger, green chillies and the mint/coriander (if applicable). Make a fine paste out of it using as much water as needed. This is masala 2.
5. Once the kasa-kasa (poppy seeds) and cashews are well soaked, grind them into a fine paste using milk as needed. This is masala 1.
6. Check the vegetables if they are completely cooked. Now add masala 2 and mix well. Add water as needed depending upon desired thickness of gravy. Cook for a couple of minutes. Now add masala 1, mix well and cover and cook on low for a couple of minutes or until first boil. DO NOT and I repeat DO NOT over boil the gravy at this stage. It will curdle and spoil it all. Check for salt and other seasonings.

Source:
Amma dearest...leave a comment if you have a concern with this recipe.

Monday, November 28, 2011

Moong Dal Khichdi

I spent last (this?) summer in Germany on an internship and my survival there was based on a simple policy: grocery shopping only when I completely run out of food. And my little town actually had 3 Indian restaurants. Yes, yes...you heard me right: THREE! And this was such a small town...geez, people do like Indian food. To top that, there were at least FOUR Indian grocery stores that showed up on my Google search. And Germany being what it is, all of them were accessible by bus within 10 mins. I "heart" EU for this reason. Believe me, live in the US in small towns like Columbia and you'll know. I mean, you WILL know the pain.

So I shopped in the range of 250 gm packages of lentils, 1 kg packages of basmati rice, one packet of paratha, one packet of papad...you get the drift, right? And it gave me the amazing freedom to experiment within my limited budgetary constraints. That's how on the last week of my internship, I ended up with 1/2 cup of moong dal, 1 cup rice, 1/2 an onion, 1 tomato and 2 shrivelled up green chillies forgotten in the corner of the fridge. I was flying back to good ol' 'merica on the following Saturday and I still needed 10 meals...no, 9 meals (my manager treated me to a lunch on the last day) before I had to leave. The only thing that I could think was to make khichdi...but it was too late to call amma for the recipe. Which of course had me feverishly looking up recipes online. I found one which surprisingly did not call for any extra ingredients apart from my sad leftover stash. It was surprisingly good and I remember very clearly that I was chatting with Mai a.k.a Shweth when I was cooking and we chatted about recipes...good times :)

OK...after that really long rant, what follows is a minimal adaptation of the recipe I found online. It's the easiest thing to make...believe me. And I love moong dal, so it's a win-win dish for people like moi.


Ingredients:
Rice - 1 cup
Moong dal - 1/4 to 1/2 cup
Oil - 1 tbsp
Jeera - 1 tsp
Hing - 1/2 tsp
Green chillies - 2, finely chopped
Onion - 1, medium sized
Tomato - 1, medium sized
Ginger - 1 inch piece
Garlic - 2 cloves
Turmeric powder - 1/4 tsp
Chilli powder - 1 tsp
Garam masala - 1/4 tsp (optional)
Coriander leaves (chopped) - 1/2 tsp
Water - 3 cups
Salt - to taste

Method:
1. Mix the rice and moong dal. Wash at least 3 times and set aside. You can also soak it for a little while, if needed.
2. Heat the oil in a pressure cooker and splutter the jeera. Add the chopped ginger, garlic and green chillies. Fry for 30 secs. Then add the chopped onions and fry until transparent and pink.
3. Add the asafoetida and fry for 10 secs. Now add the tomatoes and all the masalas and fry for about 5 minutes until oil separates.
4. Now add the washed rice and moong dal, 3 cups water and salt to taste. Cover and cook for 3 whistles and then set on low for another 15 minutes.
5. After the pressure has released, open the cooker and add water and salt if needed. The consistency must be slightly liquidy. Garnish with the coriander leaves and serve with plain raitha, papad and pickle.

Source:

Thursday, November 24, 2011

Bhindi Masala

Bhindi or Okra is a favorite green vegetable of mine. Amma makes a typical Southern Indian poriyal which is oh-so-simple and yummy. I especially love it with amma's rasam. Most of the recipes I have on my blog are skewed towards being Northern Indian cuisine which is a little weird given that I am actually a Tamilian a.ka. South Indian. Read here for the complete rant which had me side-tracked for about 30 mins. Yes, I DO know that I suffer from border-line ADD. And OCD. But, whatever.

Given my horribly health conscious lifestyle here, I hardly eat rice regularly anymore and so I'm always on the lookout for recipe variations of my favorite vegetables and other South Indian favorites that I can pair with rotis/phulkas. And that's exactly how I landed on this recipe. Everytime I pick out THE recipe to try, it's only because of one reason and one reason alone: I need to have ALL the ingredients in my spice shelf. I think I haven't yet reached that stage where I have begun experimenting wildly with my cooking. It's gonna take some time to get there. Until then, risk-averse me is going to stick to trying out recipes with minimal changes. So here goes!
Ingredients:
Bhindi/Okra - 1/4 to 1/2 lb
Oil - 1 tbsp
Cumin seeds - 1 tsp
Ginger-garlic paste - 1/2 tsp
Green chillies (slit) - 2
Red onion - 1 medium, halved and sliced lengthwise
Tomato - 1 small or 1/2 medium, halved and sliced lengthwise
Turmeric powder - 1/4 tsp
Red chilli powder - 1/2 tsp
Coriander powder - 1 tsp
Amchoor powder (dried mango powder) - 1 generous tsp
Coriander leaves - freshly chopped
Water- 1/2 cup
Salt - to taste

Method:
1. Wash the bhindi/okra and cut off the ends. Slit it lengthwise and chop into 1 inch pieces. Set aside.
2. Heat oil in a pan and splutter the cumin seeds. Add the ginger garlic paste and green chillies. Fry for about 30 secs and add the turmeric powder. Give it a quick stir and add the sliced onions and dry until transparent and pink. Add some salt to speed up the process and prevent the onions from burning.
3. Now add the bhindi/okra and let it cook for about 5 to 8 mins. Add the red chilli powder, coriander powder and salt to taste. Mix well, add 1/2 cup water and cover and cook for about 15 mins.
4. Add the tomatoes after it has cooked and mix. Add a little more water at this stage if you would like. Mix the tomatoes and cover and cook for another 15 mins.
5. Finally, add the amchoor powder and coriander leaves. Check the seasoning to make sure its right. Switch off the stove, cover and set aside until you're ready to eat.

I personally love this with fresh ghee phulkas. I've made some changes to the original recipe based on my judgement and personal taste. I've tried this umpteen times and love it. It's got an amazing tangy taste to it due to the amchoor powder and the tomatoes that are added at the very end. It also goes well with thayir sadham :) Yes, I am a South Indian who loves my thayir sadham...sue me!

Source:
Minimally adapted from this recipe -